You might be one of those people with a registered domain name but still stuck yahoo, hotmail or gmail email. You need to fully utilize your domain name and start using an email that looks like name@your-domain.com
I’m not referring to some mail forwarding trick, it’s a google hosted custom email.You might think it’s a complex stuff but it’s real easy. A complete noob like me read the tutorial and did it.
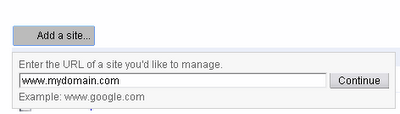
1. Now if you’ve already purchased a domain name for your blog/site, go to Google Apps

2. The next page takes you to where you will be asked to fill some information about yourself.
3. Next, set up your administrator email account. You get to create more users, delete, modify settings with this login.
4. Your account is set up now but you need to verify if you truly own the domain.
If you are a blogger, you should select “change CNAME record”. You can choose the other option to upload a html file if you have a hosting account attached with that domain name.

5. Now you should see the directions on how to change this DNS record. You will be given some set of characters that probably look like google67dgh36784. Copy this out.
6. Now login go to your domain registrar and enter this as a CNAME under DNS records.
7. Now go back to google apps and create as many as ten users. Skip this step if you’re the only one who is going to be using it.

8. The next step is activating email from your Google Apps dashboard.

9. You will be asked to enter the following MX records to point your domain to google mail servers
10 ASPMX.L.GOOGLE.COM
20 ALT1.ASPMX.L.GOOGLE.COM
20 ALT2.ASPMX.L.GOOGLE.COM
30 ASPMX2.GOOGLEMAIL.COM
30 ASPMX3.GOOGLEMAIL.COM
If you use one of the popular registrars like godaddy and the rest, google has a step by step instruction on how to set this up here.
If you’ve finished setting up your MX records, click I’ve completed this step.
10. You can now access your mail from http://google.com/a/your-domain
Alternatively, you can sut up a CNAME pointing to ghs.google.com to have your email at something that looks like http://mail.your-domain.com
You can Change to a custom url from the Email Settings in Google Apps Dashboard


