It ‘s not so encouraging accepting guest posts on a blog hosted on blogger because except from the author’s name at the top of the post, there’s no plugin to automatically display author’s bio below the post like WordPress. You need to manually write the bio along with the post while composing and it’s not so cool. If you recently started accepting guest posts, you need to manually edit those posts you’ve written previously just to make your bio appear on old posts.
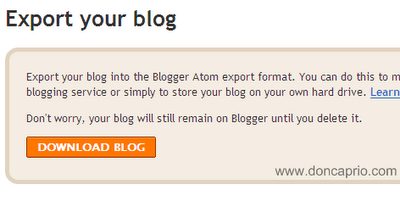
This widget allows you to display author’s bio below each and every blog post, even on blogs managed by many authors. Each and every one still get full credit for their work. This widget style is based on the very one WordPress plugin I use on this blog and you can see the demo at doncaprio.blogspot.com. Check the latest posts there I made under different authors.
To get your blog ready for guest posting, you need to first send an invitation to the guest blogger by email.
– Go to Settings > Other
– Under Permissions, you should enter the guest blogger’s email
Upon acceptance, the guest blogger can then log in to your blog to submit the proposed guest post. Though I’m now using WordPress, I took some time to test out this on my old blogspot site to be sure it actually works fine.
Adding About Me / Author’s Bio Below Each Blog Posts
1. Go to Design > Edit HTML or Template > Edit HTML depending on whether you’re using the old or new blogger layout
2. Back up your template before proceeding you can easily restore it in case something goes wrong
3. Check the box labelled Expand Widget Template
4. Press CTRL + F on your keyboard and search for this:
5. In the line just above this, paste this css style:
margin:0 0 10px 0;
padding:0;
}
.dc-about-author-containter{
background: #f2f7fc;
border: 1px solid #000;
clear: both;
margin: 20px 0;
overflow: hidden;
padding: 20px;
}
.dc-about-author-pic{
background: #fff;
border: 1px solid #e7e7e7;
float: left;
height: 100px;
width: 100px;
margin: 0 -122px 0 0;
padding: 10px;
}
.dc-about-author-pic img{
width: 100px;
}
.dc-about-author-text{
float: left;
margin: 0 0 0 140px;
}
6. We’re done with the styling, now let’s finish it up 🙂
We’ll be using conditional statements to display different about me widget for diferent authors, ok?
Search for this code in your template:
7. Just below that, paste the code in this text file:
From BLOG ADMINISTRATOR WIDGET STARTS to BLOG ADMINISTRATOR WIDGET ENDS is for your own posts. This automatically displays your bio under your posts and you should edit all the characters in red as follows:
YOUR NAME – this is the name displayed under your posts as author’s name.
YOUR PHOTO URL – your photo URL should be here. You can upload the picture to your Picasa album and then use the URL.
ABOUT YOURSELF HERE – A brief description about yourself with links to your social network and all that.

Below is a demo of what it looks like:

You should also fill the details for the guest author appropriately.
You should also repeat the widget for guest author each time you get a new author with new details. The number of guest author bio widget you have in your template depends on the number of guest authors you have.
Below is the example of the one I used at doncaprio.blogspot.com:
If you’re having any problem with this widget don’t hesitate to use the comment box and if it works for you, hit the google plus one button and say “thanks”!


)
&description=&image=https://doncaprio.com/wp-content/uploads/2012/01/author-bio-widget.png)